There are a few steps you need to take to configure poedit to work with a Zend Framework project properly. I will take you through the configuration process step by step, and in the end you should have a working installation.
In this tutorial we are on Windows, but the process is the same on Mac & Linux based systems, and poedit even looks much the same on all platforms.
Install poedit and start it, if it’s the first time you run it you should now see a Preferences dialog.
Personalize:
Your name & email – Fill these in
Editor:
You can leave all the options as their defaults, including the Line endings format [Unix]
Translation Memory:
Leave this as is for now.
Parsers:
Select PHP and click Edit.
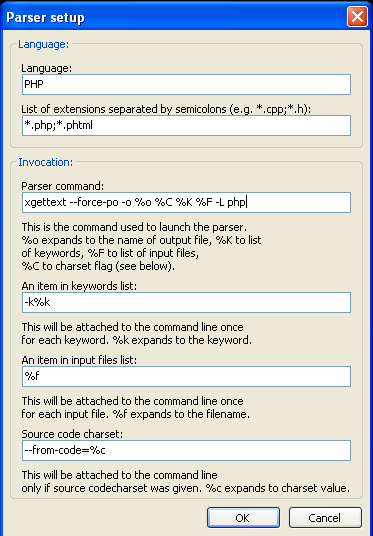
Make sure your dialog matches the one above exactly!
Now click OK twice and you are done with the preferences.
The main poedit window will now come up, click File -> New Catalog, you should now see a settings window.
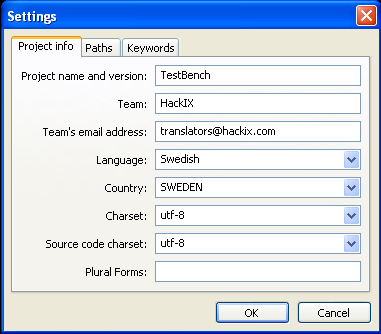
Project Info:
Fill in your Project name and version and the rest of the fields making sure you select Charset and Source code charset to UTF8 and selecting the language and country of the translation you are going to create, in my case Language: Swedish and Country: SWEDEN.
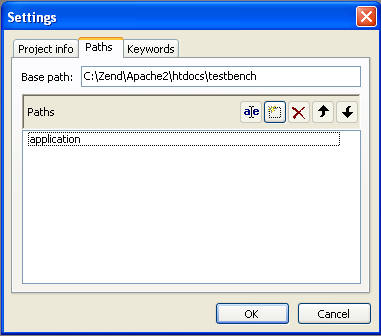
Now select the Paths tab, and add your projects base path. In my case C:\Zend\Apache2\htdocs\testbench then click the New item tool and add; application
Now select the Keywords tab and click the New item tool and add;
- translate
- _
- setLabel
- setValue
- setMessage
- setLegend
- _refresh
- append
- prepend
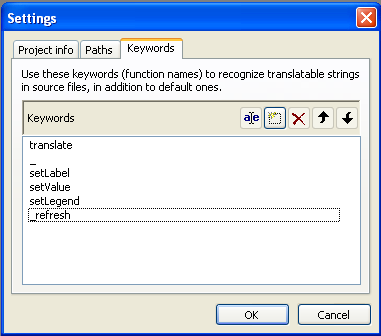
(Note: If you have any other keywords that come to mind, feel free to comment and I’ll add them to this tutorial)
Now you click OK and the Save as dialog comes up move to your project application directory and select or create the languages directory the path should look something like C:\Zend\Apache2\htdocs\testbench\application\languages and save the file as sv_SE.po (replace this with the language/locale code that you have choosen.)
Now your source code will be scanned after the keywords you specified earlier and the Update Summary dialog will be showing all the strings it detected;
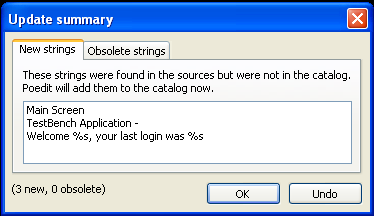
In this example the strings where caught from;
$this->headTitle()->prepend($this->translate('TestBench Application -'));
<?php echo $this->translate("Welcome %s, your last login was %s",$this->user['name'],$this->user['active']); ?>
in my layouts/scripts/layout.phtml file.
When you click OK on the Update Summary Dialog you will be taken to the main poedit window where you can translate the strings.
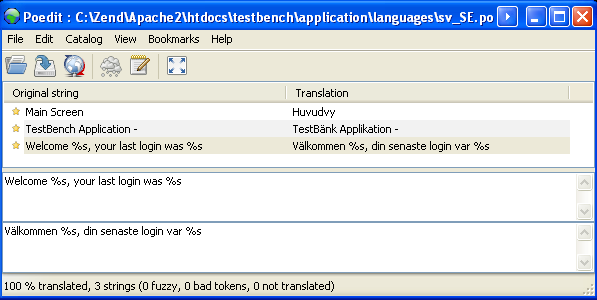
As you can see it’s very easy to work with simply enter your translations in the bottom text box.
Now after you are done you simply click File -> Save and two files will be written to your languages directory, in my case sv_SE.po and sv_SE.mo where the .mo file is the compiled version that Zend_Translate uses.
Now if you add new strings to your source code you simply load poedit and open your sv_SE.po file and select Catalog -> Update from sources and it will again show you the Update Summary dialog with all new string as well as changed strings and removed (Obsolete) strings.
There are a ton of good Zend_Translate references out there, google is your friend!
Hope this helps, enjoy!


